Share
Pin
Tweet
Send
Share
Send
From scarlet terry cloth, with a hood, with a fringing from cheerful multi-colored madapolam!


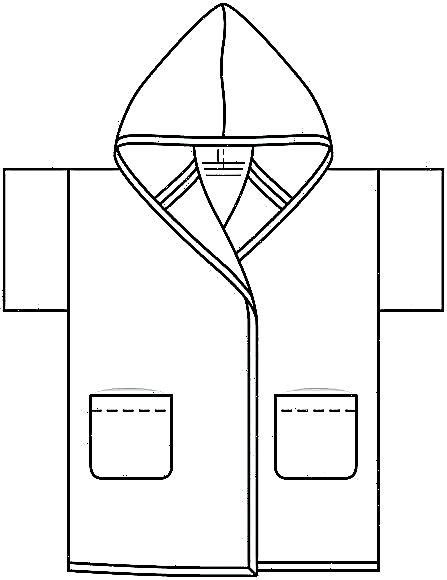

Sizes 74, 80, 86, 92, 98
The length of the back 44−48−52−56−60 cm
You will need
■ Knitted terry cloth 0.90-0.95-1.00-1.05-1.10 m 150 cm wide■ Patterned fabric Madapolam 0.70 m wide 114 cm for all sizes
Recommended fabrics: light, softly draped terry fabrics, patterned cotton fabrics for edging.
Allowances: Cut out all parts with allowances along contours 1.5 cm wide.
Cut
From a knitted terry cloth:a) 2 shelves with a length of 44–48–52–56–56–60 cm and a width of 25–25.5–26–26.5–27 cm;
b) the back is 44–48–52–56–60–60 cm long and 36–37–38–39–40 cm wide;
c) 2 sleeves 35–36–37–38–39–39 cm wide and 12–15–18–21–24 cm long, 6–7.5–9–10.5–12 cm in finished form;
d) 2 parts of the hood, 24-25-25-27-28 cm long and 23 cm wide;
f) 2 parts of a tie belt 140 cm long and 5 cm wide;
f) 2 pockets 13.5 cm long (of which 2.5 cm are the edges of the upper sections) and 10 cm wide.
Made from Madapolam:
g) a slanting collar for a fringing of external sections (a dressing gown and a belt) with a total length of 5,40-5,50-5,60-5,70-5,90 m 4 cm wide, including allowances.
Sewing
Step 1: complete the seams on the shelves and backPlace the shelves on the back with the front side to the front side, fold the side sections. Start shoulder sections from the side sections to a length of 11.5-12-12.5-12.13-13.5 cm (including allowances). Chip side slices. From the shoulder seams, measure down for armholes at 17.5–18–18.5–19–19.5 cm, put marks. Make side seams from the set marks to the bottom.
Step 2: sew the sleeves
Fold each sleeve inward, aligning the short sections. Grind these sections, while do not grind stocks along the upper and lower sections. Iron seam allowances. Fold the sleeve up to half the length with the wrong side inward, sweep open sections (stitching sections). Pin the sleeve to the armhole, aligning the seam of the sleeve with the side seam of the dressing gown. Stitch the sleeve by starting / ending the line at the combined seams, without fixing the side seam allowances.Step 3: stitch the hood
Fold the hood details with the front sides, lay a line along one longitudinal section (rear seam) and then along one short section (upper seam), rounding the corner. Cut the seam allowances to a width of 7 mm, overcast and iron in one direction.Pin the hood to the upper cuts of the shelves and the back (front side to the front side) and stitch, breaking the stitch at the shoulder seams and not fixing the allowances for the shoulder seams.
Step 4: stitch
Overshoot and iron the allowances of the side seams, shoulder seams and the seam of the hood. Sew shelves and hood on both sides of the seam of the hood, from the sections of the sides to the shoulder seams at a distance of 7 mm.Step 5: turn over with an oblique trim
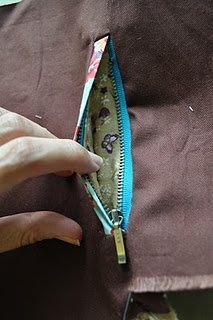
Cut off allowances for the lower cut of the dressing gown, cuts of the sides and the hood. Stitch the details of the oblique edging in one long strip. Fold oblique in half along the front side out and iron. Unscrew both longitudinal sections of the oblique edging alternately to the curved bend and iron.Unfold the tie and pin from the front side to the outer sections of the dressing gown, starting / ending at one side seam. At the corners on the collar lay folds, tighten the ends of the collar. Cut the remaining tape. Stitch the neckline at a distance of 1 cm (ironed fold). Unscrew the edging on the wrong side, rounding the cuts, tuck and sweep over the seam. On the front side, stitch the neckline, securing the inner edge.
Step 6: stitch pockets
Round off the lower corners of each pocket. Unscrew the entire cut of the upper cut of the pocket on the seamy side and grind at a distance of 2 cm. Iron the allowances along the lower and side cuts of the pocket on the seamy side. Pin the pocket to the shelf, the distance to the edge of the bead is 13 cm, to the bottom edge - 6.5–9-11.5–14−16.5 cm. The pocket is sewn to the edge. Stitch the top corners of the pocket around the perimeter of small triangles.Step 7: stitch the belt
Fold the details of the tied belt with the wrong sides, cut off the allowances along the contours, round the ends of the belt. Cut off the belt sections with an oblique tie.Layout Plans
150 cm wide terry knit

Patterned Madapolam 114 cm wide

Fold the knitted terry cloth twice with the front side inwards.
Cut the details of the oblique inlay from Madapolam spread out in one layer of fabric, the wrong side of the fabric is at the top.
Photo: burdastyle.
The material was prepared by Elena Karpova.
Share
Pin
Tweet
Send
Share
Send